Christopher Latham Sholes set a mechanical standard in 1875 that shaped how keys sat and moved. His patent explained the staggered slant that defined early typewriters. That engineering choice still informs many custom mechanical builds today.
Understanding the past helps modern makers match old proportions while using new switches and materials. Builders study physical dimensions and how rows were offset to get authentic feel and function.
This article traces the history, the reasons behind non-linear key placement, and practical steps to blend classic proportions with high-quality mechanical parts. You will learn why certain keys sat where they did and how to apply those lessons in contemporary design.
– Sholes’ patent established the original stagger and influenced later keyboards.
– Careful measurement lets builders honor old forms while using modern switches.
The Origins of Typewriter Layouts
The first commercial typing machines grew from simple, piano-like keys into the four-row systems common by the late 1800s. Early inventors aimed for familiarity and speed, but mechanical limits shaped the path forward.
The Early Typewriter Era
In 1857, makers used piano-style keys that placed letters alphabetically. Those machines resembled instruments more than office tools.
Inventors like Christopher Latham Sholes and Carlos S. Glidden refined designs in 1867. Their work led to a practical, commercial model.
From Piano Keys to QWERTY
Remington & Sons released the Remington 1 in 1874, improving durability and market appeal. By 1893, Remington, Caligraph, and Yost helped standardize the qwerty layout through the Typewriter Trust.
Standardization mattered: typists could switch machines without relearning finger patterns. That stability is one reason the keyboard layout persisted into modern keyboards.
- Alphabetic piano keys gave way to a four-row arrangement.
- Mechanical jams and speed needs pushed the move to qwerty.
- Manufacturers drove the change to ensure commercial success.
For a deeper look at period designs and how standard key arrangements spread, see the standard key arrangement reference.
Understanding the Engineering Behind Vintage Keyboard Layout Spacing Recreation
Engineering authentic key positions starts with tracing the mechanical paths that guided type-bars in the 1870s. Each key acted as a lever that needed a near-parallel route to the basket mechanism. That path dictated where letters and symbols could sit.
Modern builders must respect case constraints when trying to match that staggered slant. A small change in the case depth or plate position can shift an entire row and alter the typing feel.
A new approach maps original lever arcs to contemporary PCB footprints so modern switches sit where the levers originally moved. This keeps the look and the tactile sense of the old machines.
“The physical placement of keys was driven more by mechanics than by fashion.”
- Study original lever geometry before drafting a build.
- Account for case depth and rail positions in the PCB design.
- Test mockups to confirm row offsets match the intended feel.
The Myth of the Slowed Typist
A common story says qwerty was made to slow typists, but records from the era show teams needed machines that kept pace with fast telegraph traffic.
Telegraph operators in the 1870s routinely worked at 40 to 60 words per minute to match incoming signals. Remington marketed its typewriters in 1880 as capable of 60–70 words per minute for skilled users.
Faster still, Mr. McBride of Ottawa set a dramatic benchmark in 1889 by hitting 179 words in a single minute. These results contradict the claim that the layout or machine design aimed to bottleneck people.
“The physical arrangement of the keys was optimized for mechanical reliability rather than limiting speed.”
In short, the machine had to survive bursts of rapid typing. If it had been built to jam on purpose, Remington would not have sold so well by 1880.
- Telegraph demands required real-time transcription at high speed.
- Early typists exceeded 100 words per minute, showing the device supported rapid work.
- Mechanical design choices favored reliability over artificial slowdowns.
Analyzing Type-Bar Collisions and Mechanical Constraints
Mechanical clashes between adjacent bars shaped where letters and fingers would meet on early typing machines. Patent 207559 shows each key used a parallel lever arm aimed at the basket. That geometry forced very specific positions for rows and keys.
The Basket Mechanism
The circular type basket required staggered rows so levers could clear each other. Builders placed arms to follow near-parallel paths to the back of the machine. This reduced jams during rapid typing.
Statistical Analysis of Letter Pairs
Research using the ENABLE lexicon found surprising pair frequencies. For example, A and Z rank 131st of 325. Sholes moved letters like X and C to lower collision risk.
The Impact of Staggered Slants
A new approach to the layout shows deliberate choices. Analysts found the QWERTY pattern is extremely unlikely by chance. The right hand was often favored to spread common vowels and reduce type-bar interference.
“Sholes placed common letters to minimize jams and preserve speed.”
- The basket needed complex bar arrangement to prevent collisions.
- Pair analysis suggests positions reduced mechanical jams.
- Staggered slants aligned lever arms with the circular basket.
Evolution of the QWERTY Standard
Adoption by major firms in the early 20th century made a once-mechanical pattern into a global typing standard.
The Typewriter Trust of 1893 helped lock in a common approach across manufacturers. This consolidation meant manufacturers printed the same rows and letter positions so typists could switch machines without relearning.
Sholes’ 1889 patent refined punctuation and number placement, tightening the original engineering choices into a repeatable pattern. By 1910 the Teletype company adopted that pattern for teleprinters.
That move mattered: Teletype’s choice carried the arrangement into early electronic systems. From the 1940s through the 1970s, computers inherited the same row positions and keys, cementing the qwerty layout in daily use.
“The persistence of this arrangement shows the engineering solved both reliability and usability.”
Today the keyboard layout we use is a direct descendant of those late-19th-century refinements. Its endurance proves the original mechanical goals created a stable, global standard.
- The 1889 patent refined punctuation and numbers.
- Typewriter Trust (1893) standardized designs industry-wide.
- Teletype adoption (1910) shifted the pattern into electronic communication.
- Modern keyboards inherited the same rows and letter positions.
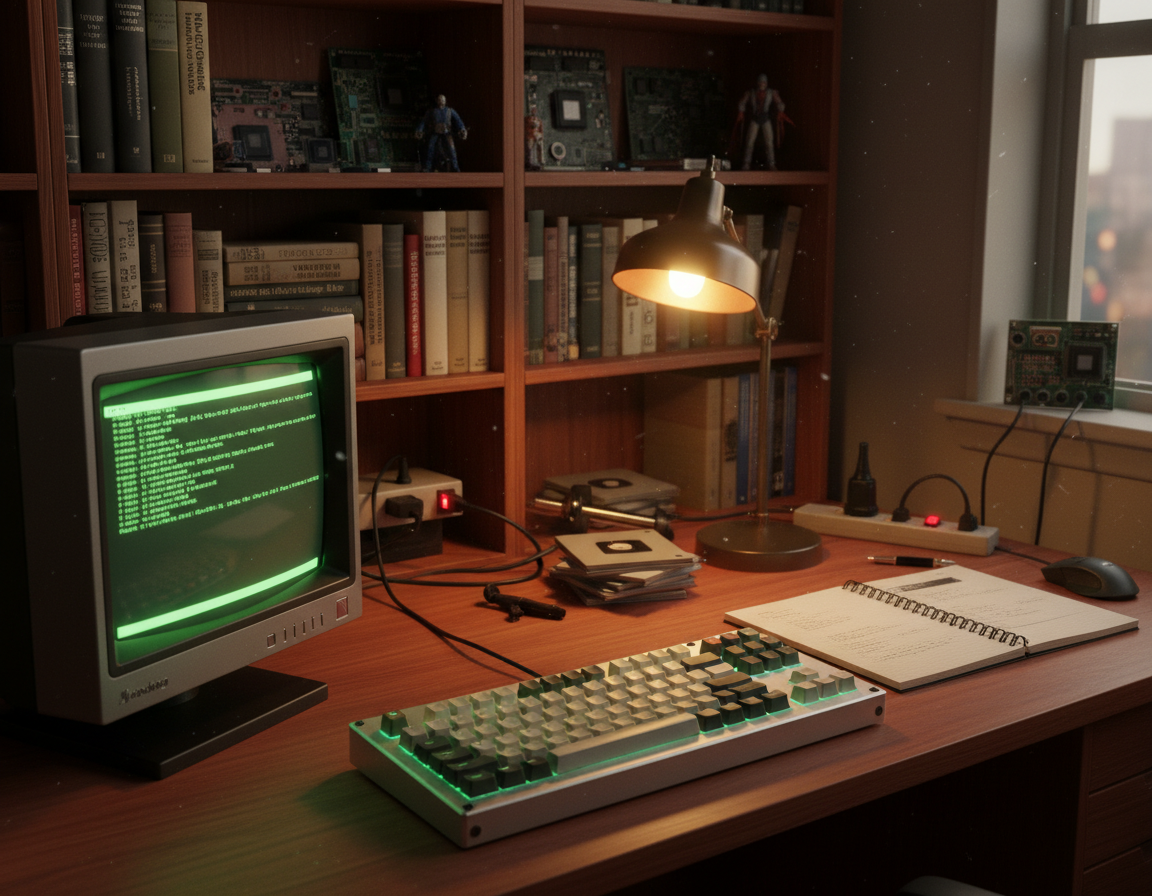
Modern Mechanical Keyboard Projects and Retro Aesthetics
Enthusiasts today fuse classic hardware cues with modern switch tech to craft boards that feel both familiar and fresh.
Many custom builds draw direct inspiration from heavy, tactile pieces like the IBM Beam Spring 75-key and the Apple M0110. These machines influence case profiles, key shapes, and overall aesthetic choices.
The appeal lies in tangible character: chonky switches, bold bezels, and non-rectangular cases that stand apart on a desk.
The Allure of Retro Hardware
Collectors and makers reference the Atari 800, Commodore 64, and the Symbolics Space Cadet when planning modern projects. Those references guide decisions about plate cutouts, key stem spacing, and profile colorways.
- Inspiration sources: Beam Spring and M0110 classics.
- Builders hunt for spherical-profile keycaps and period color palettes.
- Design choices often mix old case geometry with hot-swap PCBs and modern stabilizers.
“Recreating the character of an older board is as much about touch as it is about looks.”
Exploring Alternative Layouts for Contemporary Builds
Many builders now experiment with alternative arrangements to cut finger travel and increase typing comfort. These experiments fit modern goals: less effort, more speed, and better ergonomics for daily work.
Dvorak and the Efficiency Movement
Dr. August Dvorak designed his arrangement in 1936 to place common letters on the home row. The idea was to reduce finger motion and favor alternating hands to boost speed.
“Dvorak aimed to move frequently used keys to the home row to improve comfort and pace.”
Modern Layout Innovations
The Workman layout, introduced in 2010, shifts effort away from the index finger and trims finger travel. The Engram layout (2021) targets split columnar boards and optimizes n-gram typing.
- New approaches use AI (Halmak-style) to analyze language patterns and lower finger travel.
- Thumb keys for modifiers are a practical way to reduce pinky strain and improve reach.
- Try remapping a bottom row or testing a home row change to see real gains in comfort and speed.
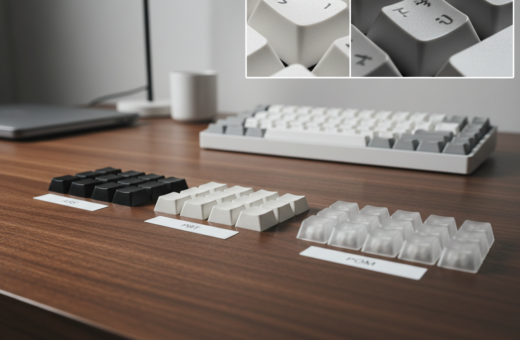
The Role of Custom Keycaps and Case Design
A board’s personality starts with the caps and case; these two elements dictate sight, sound, and feel.
Custom keycaps are essential when you want period-accurate profiles and textures. Caps with a consistent spherical profile help recreate that rounded feel on the home row and across the top of the board.
The case must be engineered to accept specific switch mounts and plate clearances. Proper case design also supports a PCB that preserves the intended keyboard layout while allowing modern features like hot-swap sockets and USB-C.
Balance matters: preserving historical proportions should not block modern function. A thoughtful layout of mounting points, standoffs, and foam dampers lets builders blend authenticity with reliable electronics.
“The physical presence of a board is defined by its case — it frames the caps and the mechanics.”
- Choose cap profiles that favor the home row feel and consistent finger contact.
- Design the case to match mounting and row offsets so keys align and feel natural.
- Integrate the PCB early in the process to avoid compromises between looks and function.
For build examples and part choices, see this short guide on modern retro projects at period-inspired builds.
Practical Tips for Designing Your Own Vintage-Inspired Board
Start your build by prioritizing the home row: map frequent letters so fingers fall naturally. Place common letters under the strongest fingers to cut effort and improve typing comfort.
Think about the bottom row next. Non-standard key sizes can force awkward finger travel. Mock the bottom row in software or on a printed sheet to catch reach issues early.
A new approach is to 3D print a case prototype. Testing a cheap resin or PLA shell saves time and money before you mill aluminum or brass.
Research period boards like the Zenith Z150 to see how their row positions shaped feel and look. Then add programmable layers so your classic layout can gain modern shortcuts and macros.
“Prototype fast, test often—small changes in row offsets change typing more than you expect.”
- Map the home row first and place frequently used keys within easy reach.
- Mock the bottom row to avoid long reaches and thumb strain.
- 3D print prototypes to validate ergonomics before final materials.
- Use programmable firmware to keep a classic feel while adding function.
Conclusion
The QWERTY story shows how 19th-century problem solving still shapes how we type today.
Its endurance as a global standard proves early engineering met real needs for speed and reliability. For many people, decades of muscle memory keep the qwerty layout in daily use.
Recreating old key positions can be rewarding for builders who want history and feel. Thoughtful design helps modern keyboards honor the past while fitting current typing habits and the way fingers move.
Ultimately, the best choice balances comfort, function, and the aesthetic that makes mechanical builds satisfying to own and use.